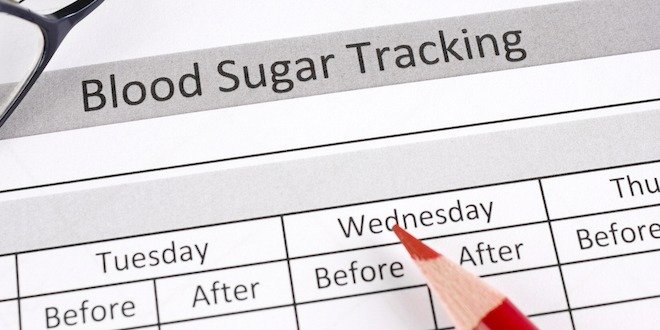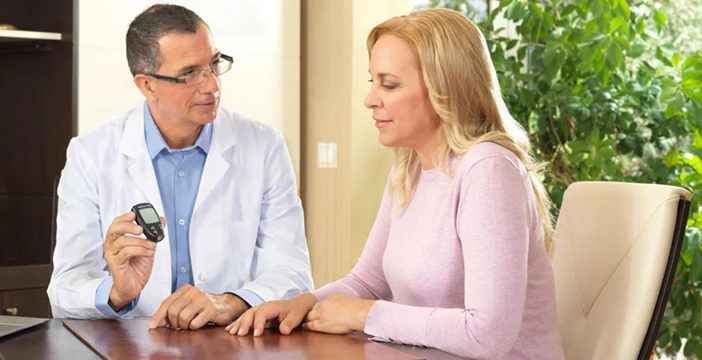
Learning to check your blood sugar is a valuable skill to help you understand and manage your diabetes. It provides important feedback on how your medications and/or lifestyle habits are working for you. A blood glucose meter is a key piece of equipment which makes this possible, and you can learn more about how they work here.
Article highlights:
- Discover how a blood glucose meter works and how to choose one that best suits your needs.
- Learn how to use it optimally and make testing less difficult.
- Find out when it’s time to speak to your healthcare provider about test results.
What is a blood glucose meter?
A blood glucose meter is a small, portable device that measures your blood sugar (glucose) by providing ‘a snapshot in the moment’ reading rather than tracking your sugar over time. When choosing a meter, make sure you also purchase a compatible set of test strips and lancets. Once you have your supplies, ask your pharmacist or another member of your diabetes healthcare team to walk you through setting up the device and how to use it properly.
Who should use a blood glucose meter
A blood glucose meter may be useful for people living with diabetes, particularly those who take insulin or medications that can cause low blood sugar (hypoglycemia). Regular monitoring can help guide treatment decisions, such as medication dosing and lifestyle adjustments.
Some people with type 2 diabetes who are not taking insulin may also benefit from checking their blood sugar at specific times to understand how food, physical activity or medication changes affect their levels.
People with prediabetes may occasionally be advised to check their blood sugar as part of an individualized care plan, but routine home testing is not generally required. People with gestational diabetes are often advised to monitor their blood glucose regularly as part of their pregnancy care.
How does a blood glucose meter work?
A blood glucose meter works by measuring the amount of sugar found in a small sample of your blood. When your blood touches the narrow end of the test strip, a special coating reacts with the glucose to create an electrical signal. The electronics in the meter then read this signal and displays your current blood sugar within seconds. The amount of blood needed to test your glucose level is very small, often less than one microliter.
How do you check your blood sugar with a glucose meter?
A proper blood glucose reading is done by having the following supplies in place:
- A blood glucose meter, along with compatible test strips
- Lancets (small needles used to prick the finger) and a lancing device, or individual lancet devices
- A sharps container to safely store used lancets and other sharps. Follow your local pharmacy or municipal disposal instructions.
- A logbook or app, to track your readings over time if you prefer
Here are 7 basic steps to test your blood glucose:
- Wash your hands thoroughly with soap and warm water, then dry them completely. This helps remove traces of food or sugar that could affect your reading.
- Insert the darker metallic end of a test strip into your blood glucose meter. Most devices will turn on automatically once inserted. Wait until the meter signals it is ready to accept a blood sample.
- Insert a new lancet into the lancing device and adjust the depth setting if needed. Start with a shallower setting and increase it if you cannot obtain enough blood.
- Prick the side of the fingertip (avoid pricking the finger pad, because it is often more painful).
- Wait until a drop of blood appears. If needed, gently massage the finger toward the fingertip to help obtain a blood drop. Avoid squeezing the finger excessively.
- Gently touch the edge of the test strip to the blood drop and allow it to draw the blood into the strip. Keep the strip in contact with the blood until the meter indicates that it has enough blood to begin testing. Always check your specific meter’s instructions since some models work differently.
- Wait a few seconds for the reading to appear and record the glucose level displayed.
How often should you check your blood sugar?
A blood glucose meter is only useful if it is being used and the results are being reviewed. Although tracking blood sugar can benefit anyone living with diabetes, how often you should test depends on the type of diabetes you have and the recommendations from your diabetes healthcare team.
In general:
- If you have type 2 diabetes and are not taking medications: Daily testing is usually not required. It may be a good idea to check how foods, physical activity or other lifestyle habits may affect your blood sugar.
- If you have type 2 diabetes and take non-insulin medications: Testing may be recommended if you take medications that can cause low blood sugar, are not meeting your blood glucose targets, are changing medications or are experiencing illness. Talk to your pharmacist or healthcare provider to discuss your individual needs.
- If you have type 2 diabetes and are taking insulin: Regular testing is important to help guide insulin dosing and identify low or high blood sugar. The frequency depends on your insulin regimen and whether you use a continuous glucose monitor (CGM). If you take multiple daily insulin doses, a CGM may help reduce the burden of frequent finger-prick testing.
- If you have type 1 diabetes: Regular glucose monitoring is essential. Many people use a CGM, but blood glucose meters remain important for situations when a CGM reading needs to be confirmed or the sensor is unavailable.
- If you have gestational diabetes: Your healthcare team will recommend a testing schedule based on your pregnancy and treatment. This commonly includes testing fasting and after meals. A CGM may be appropriate for some people, but finger-prick testing remains part of care for many.
In addition to the above, certain situations may require more frequent testing. This can include driving, exercising for long periods or drinking alcohol, particularly if you take insulin or medications that can cause low blood sugar. These activities can affect glucose levels, so follow your healthcare team’s recommendations for monitoring and treating low blood sugar.
Keep a glucose meter handy if you use a CGM, so you can confirm your numbers when readings do not match how you feel or when your sensor is not working properly.
How accurate are blood glucose meters?
In Canada, blood glucose meters must meet rigorous Health Canada standards to be approved for sale. However, no meter is perfectly accurate, and results can vary slightly from one test to another. Factors such as incorrect testing technique, damaged or expired test strips, temperature and moisture can affect readings.
Here are some tips to ensure consistent, accurate and reliable results from your meter:
- Keep test strips in their original vial since moisture and heat can damage them. Check the expiration date before use, and close the vial promptly after removing the strip.
- Wash and dry your hands thoroughly, as wet or visibly dirty skin can affect results.
- Use a new lancet for each test. Never share your lancing device with another person.
- Consider replacing your blood glucose meter if it has been damaged or is no longer functioning properly.
Diabetes Canada recommends comparing your blood glucose meter reading with a laboratory blood glucose test at least annually, or when your A1C does not match your meter readings. Ideally, the meter reading and laboratory blood sample should be taken at the same time. A healthcare provider can compare the two results to help determine whether your meter is working accurately.

What should you look for when choosing a blood glucose meter?
Many different brands and models of blood glucose meters are available to purchase at your local pharmacy, and the right choice depends on your personal needs and preferences. Here are some key features to consider:
- Small blood samples: Helpful for young children, older adults with frailty, or those with calloused fingers.
- Second-chance sampling: Allows extra blood to be applied to the same strip, which is ideal for those with dexterity problems.
- Colour-coded results: Provides visual feedback to help you understand whether your readings are within, above or below your target range.
- Audio capabilities: Provides step-by-step spoken instructions, ideal for those with vision issues.
- Bluetooth/app connectivity: Enables digital tracking and simple data sharing with healthcare providers.
If you feel any of these may apply to you, consider spending some extra time to speak with your pharmacist or healthcare provider, so they can help you explore the best options to meet your specific needs.
How much do blood glucose testing supplies cost?
Managing the cost of diabetes supplies can be challenging, but there are options that may help you save money. Test strips can cost approximately $70 to $100 for a box of 100 strips, although prices vary by brand and pharmacy. Some manufacturers or pharmacies may provide a blood glucose meter at little or no cost when you purchase their test strips; otherwise, a meter may cost approximately $30 to $60. Other everyday supplies (i.e., lancets and alcohol swabs), can add an extra $10 to $20. You can ask your local pharmacy about obtaining a sharps container for used lancets. Disposal options and fees may vary by location.
Depending on your province or territory and eligibility criteria, public drug programs may cover a set number of test strips each year with a valid prescription. Coverage limits and eligibility requirements vary. Many private or workplace benefit plans can also help cover these expenses. Please speak with your pharmacy team to explore available coverage options.
What options can you try if testing is too painful, difficult or just too inconvenient?
If frequent testing is uncomfortable or difficult, a few adjustments may help make testing easier:
- The piercing depth for many lancets are adjustable, so try a shallower depth setting to reduce pain.
- Changing fingers, or switching to the opposite side of the fingertip, can help reduce soreness and calluses from developing over time.
- Warming up the hands before testing can encourage blood flow, making it easier to get enough blood.
- If frequent testing disrupts your daily routine, ask your diabetes care team whether a CGM might be a better fit for you.
- Some meters allow ‘alternate site testing,’ which means using blood from areas such as the forearm or palm instead of the fingertip. However, glucose levels at these sites may not reflect changes as quickly as fintertip readings. Alternate-site testing may not be appropriate when glucose is changing rapidly or when you suspect low blood sugar. Ask your diabetes healthcare team whether this option is suitable for you.

Do you still need a blood glucose meter if you use a continuous glucose monitor (CGM)?
Because CGMs measure glucose in the fluid under your skin rather than directly in your bloodstream, their readings may lag behind blood glucose levels, particularly when glucose is changing rapidly. This can happen after meals, before, during and after exercise, or when you are sick. This means a CGM is not a full replacement for a traditional blood glucose meter. You should also keep a traditional blood glucose meter on hand to confirm a CGM reading if your symptoms do not match the sensor reading, if the sensor is not working properly, or if your healthcare team recommends a finger-prick test.
When should you talk to your healthcare provider about your blood sugar readings?
While occasional ups and downs in blood sugar are normal, there are some patterns worth mentioning to your diabetes healthcare team. Consider reaching out if:
- Your readings are repeatedly higher or lower than your target range, even when following your medication and lifestyle recommendations.
- You experience repeated episodes of low blood sugar, particularly if you take insulin or medications that cause hypoglycemia.
- You experience symptoms of high or low blood sugar that do not match what your meter shows
- You notice an unexplained change in your usual blood glucose pattern
When you speak to your healthcare provider about your blood sugar readings, make sure to bring along your blood glucose meter, logbook or available app data to help them identify patterns and adjust your treatment plan.
Your 3-step action plan to using blood glucose meters effectively
- Get set up properly. Choose a blood glucose meter, compatible test strips and lancets from your pharmacy, and ask your pharmacist or healthcare provider to show you how to use it correctly.
- Test consistently. Follow the testing schedule recommended by your diabetes healthcare team and keep a logbook or app to track your readings over time.
- Know when to check in. Talk to your healthcare provider if you notice repeated highs or lows, symptoms that don’t match your readings, or any changes to your usual pattern.
Checking your blood sugar with a glucose meter is a simple, reliable way to get feedback on how your body is responding to your diabetes care. With the right equipment and supplies, a consistent testing routine, and support from your pharmacist or healthcare provider, you can turn each reading into a useful piece of information to understand the bigger picture of your diabetes management. Don’t hesitate to reach out to your diabetes healthcare team with any questions along the way. They’re there to help you get the most out of your meter and your overall care plan.